Need to show data in a flow? Use text templates.

You've been asked to create a flow for your users that displays a list of records. You want those records to be formatted beautifully, with bolding and hyperlinks. Fear not. Text templates are here to help.
Go with the Flow
Flows are an extremely powerful Salesforce tool that let you not only automate complex business logic. They let you create complete, custom, user interfaces to make lives easier, all with clicks, not code.
As you dive deeper into creating flows, you may find yourself needing to preview a list of records. You may want to add sweet, sweet formatting - including hyperlinks referencing other related objects in Salesforce. The solution is a handy resource called 'Text Templates'.
Our Example: Previewing a List of Accounts
I've been working on a custom package to help Canadian charities do CRA compliant tax receipting in Salesforce. One requirement is giving users a way to produce 'annual' receipts for those supporters that want only one tax receipt for the year.
I wanted this entire solution to be built using platform tools - without visualforce or custom apex.
The solution? Create a screen flow that can both triggered the creation of the annual receipts - and display information about the accounts the require them.
Let's get started.
Step 1: Create your Resources
To create a flow, go to Setup > Flows > New.
Flows use resources. Some resources Salesforce will create for you (when you do things like get a record from the database). Some resources you create yourself. A resource can be anything from a formula, to a list of records, to a set of choices for a picklist.
Let's start by creating a text resource to store the preview text for our list of acounts.
Click the 'New Resource' button in the menu to the left of the screen. Let's name our resource 'AccountsDisplayText'.
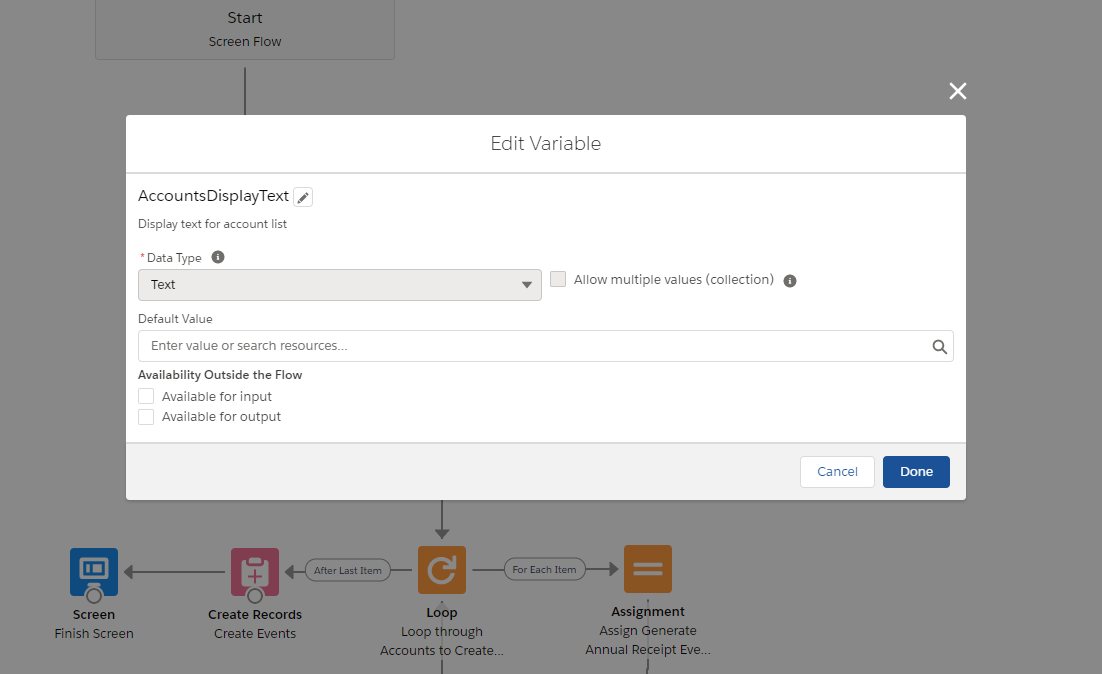
A text resource to hold our final display text.
Now that we have a place to store our good, good display text, let's get some records.
Step 2: Get records
In the 'Toolbox' to the left of the screen, under the 'Elements' tab, drag a 'Get Records' element onto the canvas (unless you're using Auto-layout - in which case, click the 'plus' on the end of one of your branches).
Give your element an easy to reference API name. We'll use 'AccountItems'.
Fill out the element, filtering out the records you want to display. Under 'How many records to store', check 'All Records' and let Salesforce store all the fields for you.

Get your records from whatever object you want to include in the text template.
Step 3: Loop through the Records
Drag a 'Loop' element form the toolbox. Again, give yourself an API name that works as a variable. Whatever you choose will become the name of the loop variable we use in our text template. For our example, let's use 'AccountLoop'.
Select 'AccountItems' as the collection of records we will be looping over (this is the records we retrieved in the previous step).
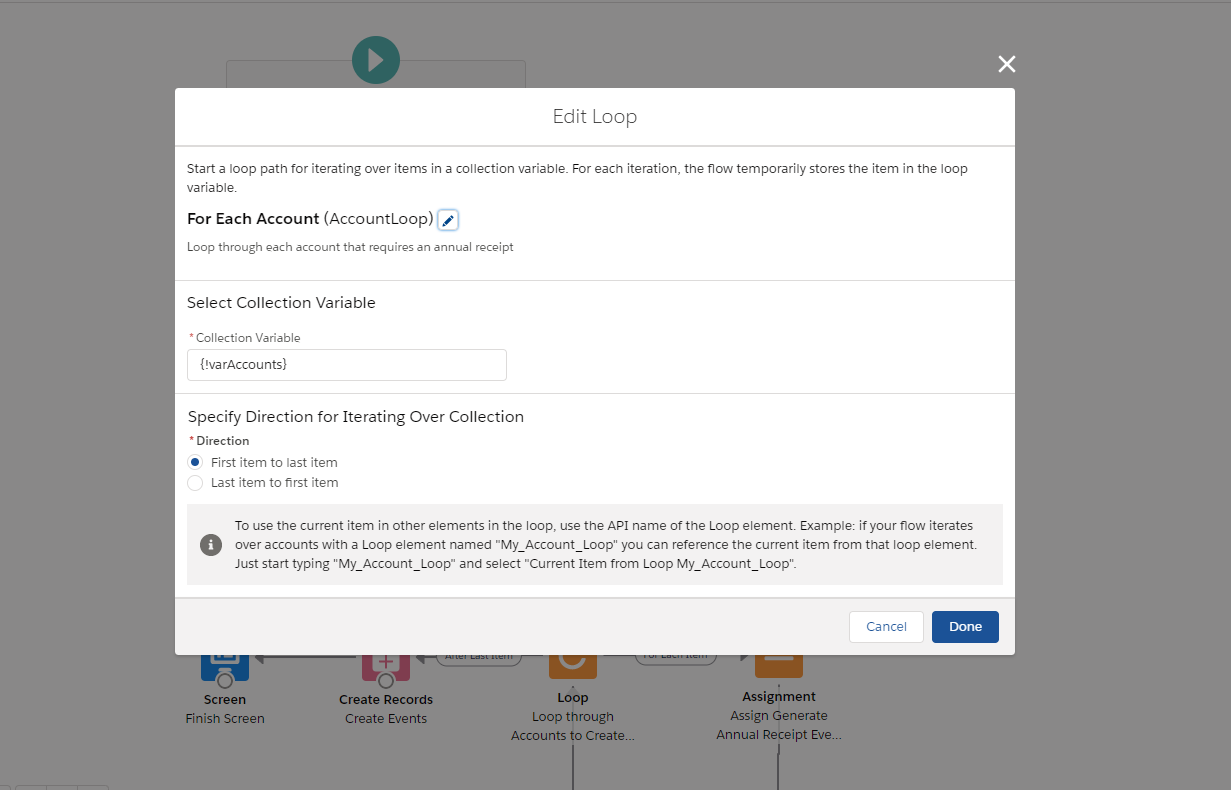
Let's get loopy
Step 4: Create a Text Template
Now it's magic time. Create a new resource of type 'Text Template'. We want our text template to display as Rich Text (which is basically HTML).
Use the 'Add element' box to find the names of the various elements you want to display in your template. For this example we're going to pull in data from the Loop Variable created above (for us, that's {!AccountLoop}).
Now that we have our formatted text template, all we have to do is add it to our display variable - the 'AccountsDisplayText' we created in step 1.
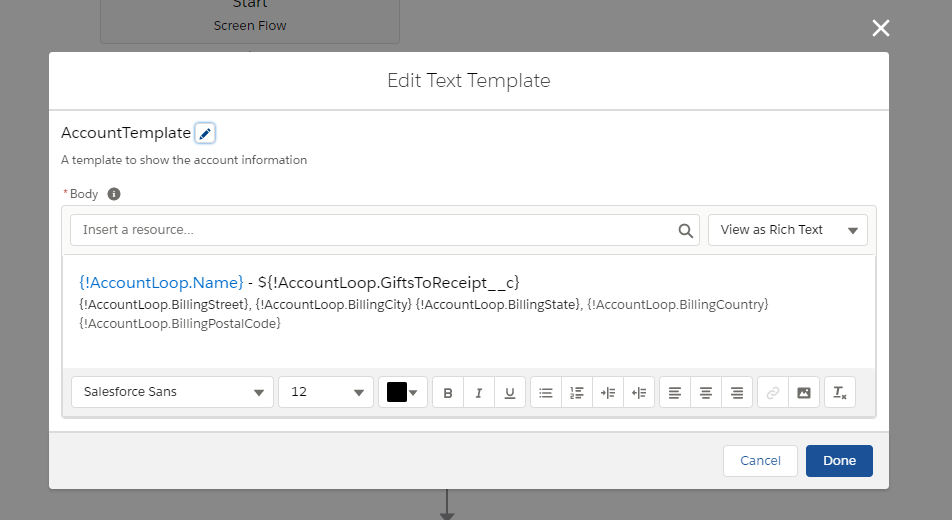
Our text template, including relevant fields from the loop variable.
Step 5: Add Text to the Template
Drag an 'Assignment' element from the toolbox onto your canvas. In the first field, select the 'AccountsDisplayText' resource.
Set the operator to 'Add'.
Then, in the value field, select our newly created template.
When the flow is run, Salesforce will loop through our records, updating our loop variable (and our text template) with the appropriate values, and adding it to our shiny display text.
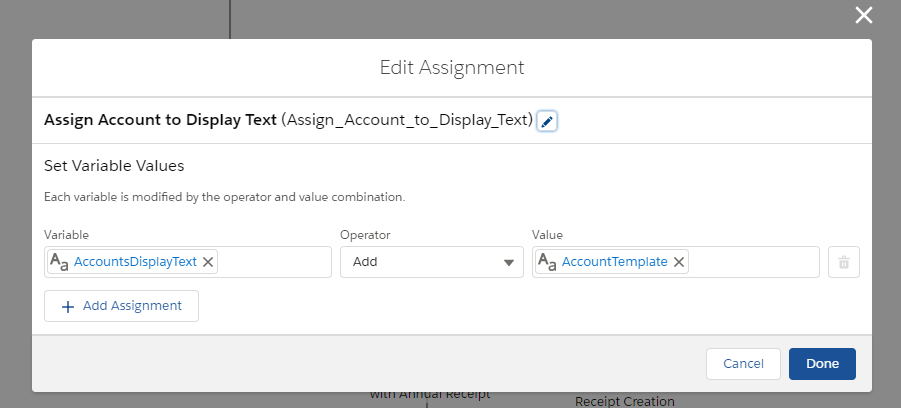
Use the assignment element to add our formatted text template to our final display text.
Step 6: Display your (now Beautiful) Data
Drag a screen element from the tool box and, after filling out the required label and API fields, drag a 'Display Text' element from the sidebar.
Drop in our 'AccountDisplayText' (and a tidy heading explaining the data).
Click 'Save' -- and we're done! We've successfully created beautifully formatted data for our users to preview.

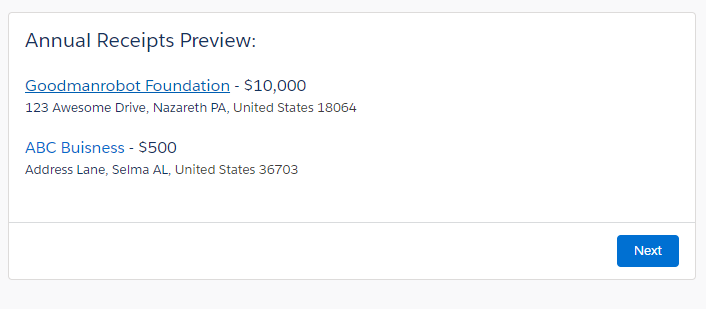
A preview (screen) of what's to come...
The result
Text templates are extremely useful. You can use them with a single record or a list of records (using a loop) and are a great way to add formatting and hyperlinks to the data you present in a screen flow.
Tada!